This free boilerplate allows creating a working SaaS web application. Please file all the information on our website: https://www.saasforge.dev
- Python (Flask) - backend
- PostgreSQL - database
- ReactJS - frontend
- CSS/SCSS for styling
- Fontawesome
- Webpack/Babel - frontend building
Currently, the boilerplate works with Python 3.5.
- Email authentication (with email confirmation)
- User registration, login, logout
- Simple user profile page
All features/functions are put into separate structures, often front-end and back-end side-by-side. The whole project is divided into the following parts:
Based on Flask blueprint, it allows separating parts of an application that are significantly different each from another and requires a different level of authentication/authorization.
- Authentication (contains the root HTML file and linked to the authentication ReactJS component)
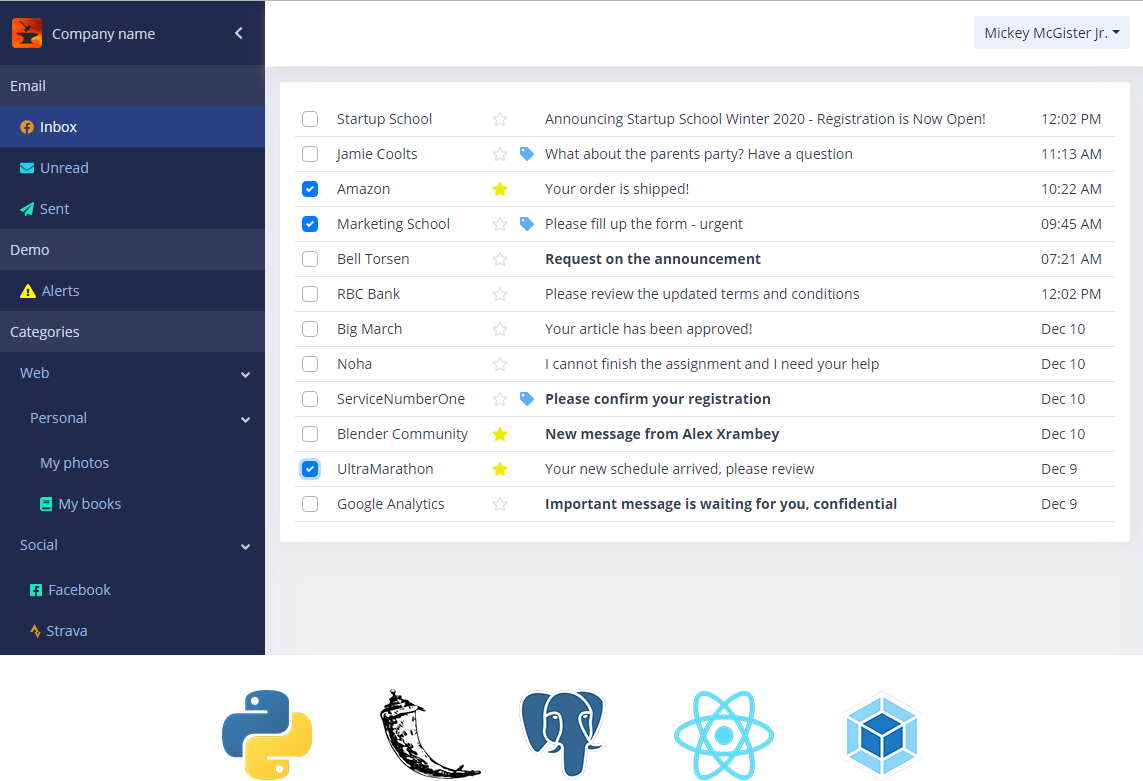
- Dashboard (dashboard root HTML linked to the dashboard view)
- Errors page (for serving back-end error, not a blueprint, just a simple HTML page)
Modules are the code that can't be decoupled and should go together: front-end and back-end. They both belong to the same functionality and front-end often calls endpoints from the same module's back-end.
The API endpoints will be imported and registered in the dashboard blueprint automatically.
If back-end requires to initialize some extension using init_api() this function should be provided at the .py code and will be called automatically.
Contains the server-side API and ReactJS components.
- API, user registration/email confirmation logic.
- The authentication is implemented with using JWT.
- Component with routes working as a SPA (single page application)
- Responsive design
- Pages:
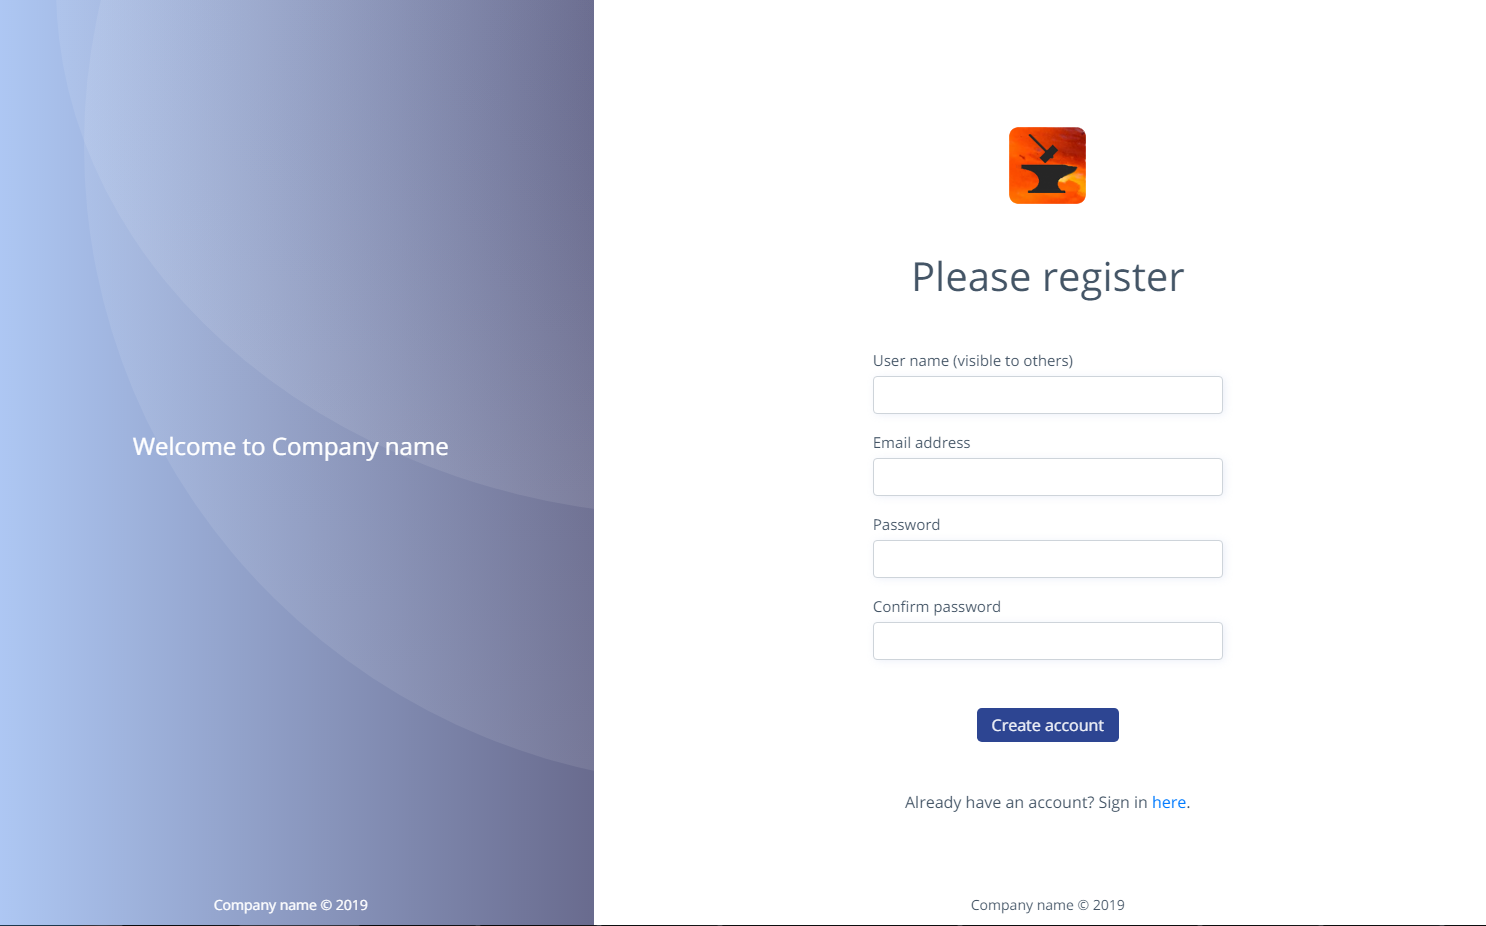
- register
- login
- finish registration info page
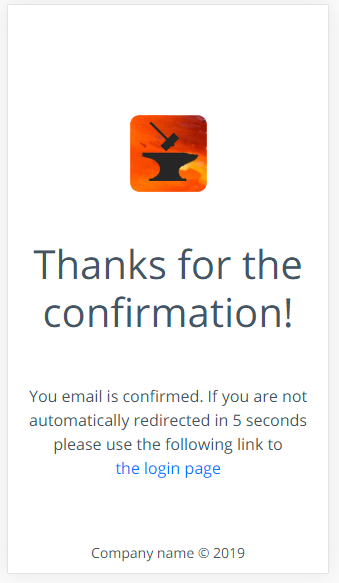
- confirmation page (with automatic redirection to the login page)
Registration page on a normal computer screen
Registration page on a mobile screen

Confirmation page on a mobile screen
Is used for the token authentication. The component has the API server-side part and JS file with functions called automatically. In our implementation we use cookie-based token as for it's most safe method of using tokens at the moment.
It has just 4 functions:
- init_app (Inits JWT-Flask manager and add needed config variables to the application)
- login_create_tokens(creates a token on user's login and add attach the corresponding cookies to the response object)
- logout(unset cookies from the response on user's logout)
- token_refresh(updates the access' token on demand).
This file is referred in the Auth jsx component and it's only purpose is to add the interceptor in all the following requests done by axios. You don't need to call it directly.
Contains demo views for alerts.
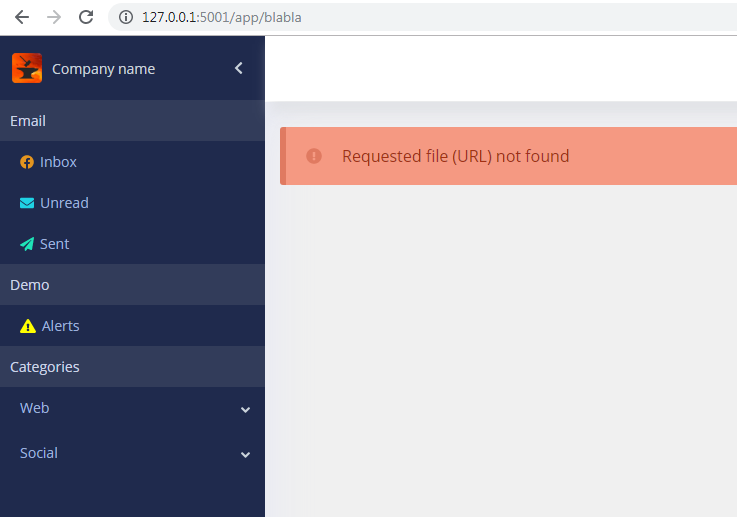
Currently, only one error (404, file not found) is currently handled. When a user enters a non-existing URL (for example, /app/blabla), the error will be shown:
Contains one endpoint /app/api/profile with 2 methods:
- GET (login required): returns the current user data
- POST (login required): updates the current user profile (username)
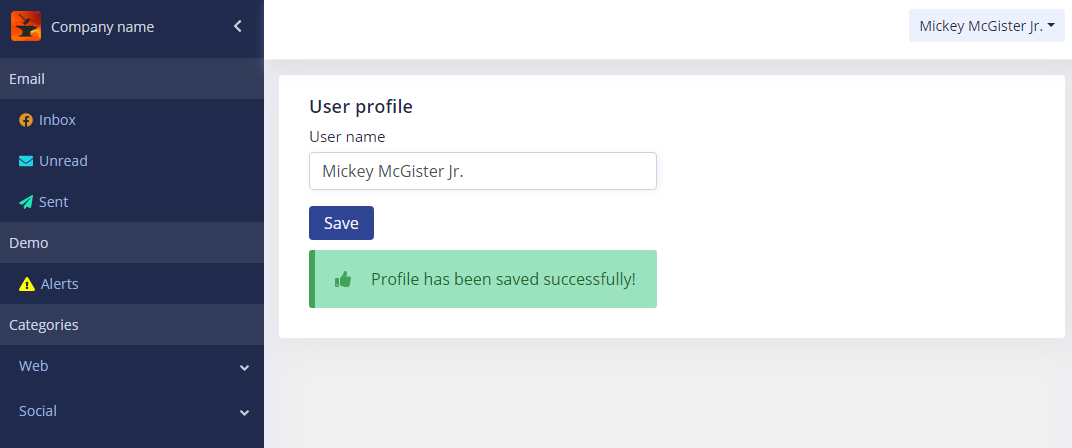
Simple view to update the current user's username:
Components are ReactJS piece of code, sometimes accompanied by CSS. Doesn't have any back-end part. Note. This is just description of components, all documentation can be found for each component in its folder.
Styled block with and icon and text. There are 4 types of alerts:
- Success
- Info
- Warning
- Error
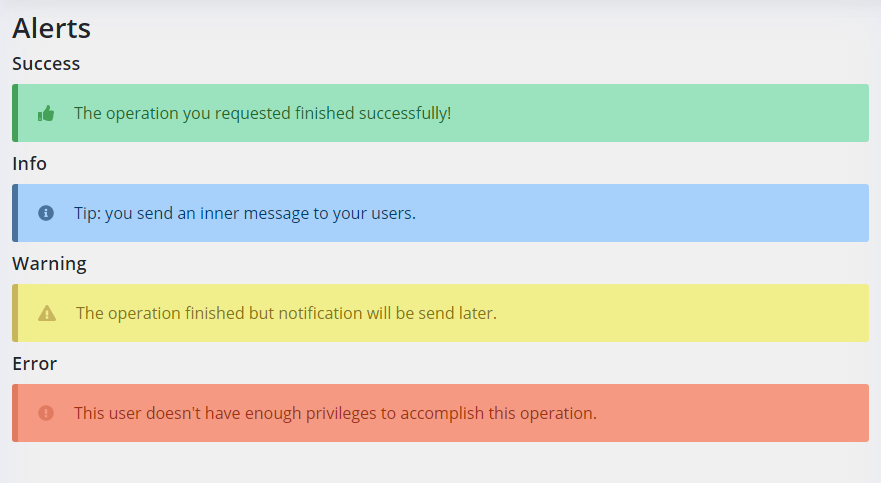
Tip You can set up if you want an alert to disappear after a required number of seconds (see documentation for details).
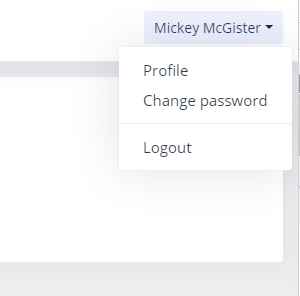
Dropdown menu is used in the header of the dashboard. It's based on a simple JSON structure, for example this data
const topMenu = [
    {title: 'Profile', url: '/app/profile', component: lazy(() => import('@src/modules/profile/ProfileView'))},
    {title: 'Change password', url: '/app/password', component: lazy(() => import('@src/modules/password/ChangePasswordUI'))},
    {divider: true},
    {title: 'Logout', url: '/api/auth/logout', method: 'post', redirectUrl: '/auth/login'}
];
will generate the following menu:
- Specify data in the human-friendly JSON data structure
- You can specify divider
- You can specify method if it's not POST
- You can specify redirectURL if you don't need to load any component but rather redirect user to the different page
- You don't need to import components anywhere else, all routes will be generated automatically
Responsive, collapsible menu with any amount of items on each level. You create it just filling up the JSON data file:
    {
        groupTitle: 'Demo',
        items: [
            {
                title: 'Alerts',
                icon: 'exclamation-triangle',
                color: 'yellow',
                url: '/app/demo/alerts',
                component: lazy(() => import('@src/modules/componentsDemo/AlertDemoView'))
            }
        ]
    }
Note. If you prefer you can import component separately and assign it excplicitly in the menu data structure.
Menu when expanded and collapsed
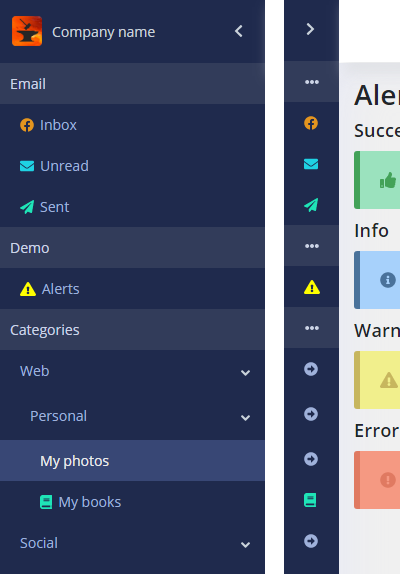
Menu on the small screen

- Specify data in the human-friendly JSON data structure
- You can specify icon (Fontawesome) and color for items (if you don't the default icon and colors will be used for the collapsed version)
- You can specify url and lazy loaded component for better performance
- You don't need to import components anywhere else, all routes will be generated automatically
Just small piece of HTML containing link to our website (SaaSForge). You may remove it but you can't replace it wit your own brand.
Can be used for the sending transactional email. Example of using:
from src.shared.services.email import service as email_service

email_service.send_email(user.email, get_config_var('COMPANY_NAME') + ': Confirm your registration',
                        text_body,
                        html_body,
                        get_config_var('COMPANY_NAME'),
get_config_var('MAIL_DEFAULT_SENDER'))Some important utils are located in /src/shared/utils folder.
Contains functions to update database based on the current db_models. Automatically finds all models. Don't call this function directly, it can be called implicitly using the following script:
flask dbupdate
Contains the instances of extensions to be used in different files. All of them are inited in the app factory.
Contains several functions used globally. Some of them are also available for using in jinja.
Safely returns the corresponding app.config[var_name] if found, else None.
Example of using in jinja HTML layout:
<title>{{get_config_var('COMPANY_NAME')}}</title>Takes an errors object (like {'error1': 'Text of error 1', 'error2': 'Error 2'}) and returns a single string containing all the error texts.
If some error (non-handled exception) occured it handles and returns the following page:

To protect endpoints and make them accessible only if user is authenticated, use this wrapper. Currently, it wraps JWT wrapper, but you can easily change it to anything else. Example of using:
from src.shared.utils.user_auth_wrapper import login_required

@profile_api.route('/')
class retrieve_user_profile(Resource):
    @login_required
    def get(self):
...This function wraps JWT get_jwt_identity and returns the current user's id what can be easily used for getting any data associated with the current user:
from src.shared.utils.user_auth_wrapper import get_current_user_id

@profile_api.route('/')
class retrieve_user_profile(Resource):
    @login_required
    def get(self):
        current_user_id = get_current_user_id()
        current_user = db_user_service.get_user_by_id(current_user_id)
...Contains the following tables:
- User
- Role
- Account
- AccountHistory
When done any changes to the tables including adding new tables run the following command from the terminal:
flask dbupdateNote. Make sure your environment variables has the following var: FLASK_APP=application else it wount work.
Note 2. Don't forget to add db_url variable with URL to your database to the environment variables.
Tip. When this command runs for the first time it creates all the tables as well as 2 roles: User and Admin.
- All features are now divided into units and components. Frontend and backend are put side-by-side for easier reference and development.
- Handling 404 and 500 errors
- AWS Beanstalk-friendly (you don't need to change any files' names to start deploying the project there)
- Automatic importing APIs, namespaces (when add a new API you don't need to import it explicitly, you just need to name it api.py)
- All styles in one folder what allows to change and create a new theme fast (see /src/shared/theme)
- ES6
- Refer @src as a root source folder in you JSX and JS code
- While creating components with backend Python code and if you want to provide any API endpoints (like '/app/api/whatever'), put them into api.py file. It will be found and imported automatically.
- If you API file needs to register some extension provide the init_app(app) function and it will be called automatcally. For example:
def init_app(app):
jwt.init_app(app)- If you would like to create a sevice to be called from the server-side code (not by the front-end using endpoint) create a new folder (file) in the /src/shared/services folder.
Note. If you need to use some extension there, the same create a function init_app that will be called automatically.
Using in Python (in html files): For example, to specify path to a resource in some component:
<link rel="icon" type="image/x-icon" href="{{ url_for("custom_static",
filename="shared/components/media_component/favicon.ico") }}" />- Add the variable in config.py directly and assign its value (only if it's not sensitive, like a flag to use SSL or TLS)
- Sensitive data put into the environment variables. It could be done in 2 ways:
- Add them into venv/scripts/activate script
- add them into .env file in the project folder.
- In the code always call get_config_var:
from src.shared.utils.global_functions import get_config_var
get_config_var('var_name')
This function also can be safely used in jinja HTML files:
<title>{{get_config_var('COMPANY_NAME')}}</title>Use axios(link) for making requests. For example (asynchronous way):
import axios from 'axios';
...
componentDidMount = async()=> {
    // Load user data
    try {
        let response = await axios.get('/app/api/profile');
        if (response.data.result){
            this.setState({ username: response.data.username});
        } else {
            this.setState({ status: 'error', message: response.data.error || 'Some error occured during this request... please try again.' });
        }
    } catch {
        this.setState({ status: 'error', message: 'Some error occured during this request... please try again.' });
    }
}Before start make sure you have installed Python 3 and Node.js. Please follow the official instructions. Also, you need to have a PostgreSQL database handy. If you don't want to install it you can use ElephantSQL service, they have a free plan: https://www.elephantsql.com/plans.html.
-
Download the full zip or pull code from the repository, find full instruction in Github documentation
-
Add necessarily environment variables (you can add them into /venv/scripts/activate file or into .env in the root folder):
- FLASK_APP=application
- db_url='postgres://user:password@dbhost:port/database'
- JWT_SECRET_KEY='your jwt secret key'
- SECRET_KEY='your secret key'
- MAIL_SERVER = 'mail server'
- MAIL_PORT = Number (like 465)
- MAIL_USE_SSL = Bool (True of False)
- MAIL_USE_TLS = Bool (True of False)
- MAIL_USERNAME = 'your email'
- MAIL_PASSWORD = 'your password'
- ADMIN_EMAIL = 'your admin email'
- MAIL_DEFAULT_SENDER = 'the same as your email'
Note. At least 2 first variables MUST be set up (FLASK_APP and db_url) else the installation script wont' work.
JWT_SECRET_KEY and SECRET_KEY are just strings that not easy to guess, for example, it may be 'My Co0LServ_ice'.
Tip. If you are puzzled how and why .env is used please read this explanation on Stackoverflow
- Run the command (Windows):
init
(Mac):
./init.sh
For any problem happening during execution of this command please see the section Troubleshooting below.
⚠️ Warning! This command will first drop ALL tables in your database. (You can comment this part if you wish, see /src/shared/utils/db_scaffold, line 25.)
- If everything is going fine you will see the following text in your terminal:
* Serving Flask app "application"
* Environment: production
  WARNING: Do not use the development server in a production environment.
  Use a production WSGI server instead.
* Debug mode: off
* Running on http://127.0.0.1:5000/ (Press CTRL+C to quit)
If you prefer to go through the installation process manually, please refer steps from the according version of init file in the root folder.
After you change something in your database models you should update the database itself. It can be done easily with the following command:
flask dbupdateNote. If you added some code including changes done into your model, and then run flask dbupdate and see some weird errors like Error: no such command "dbupdate" it means you have a compilation error. Try to run your code and see if there any errors, fix them and try to update the database again. To make sure there are not compilation errors, run the following command:
flask run
Note 2. Another reason for this error can be that you didn't add the following environment variable:
FLASK_APP=application
⚠️ Warning. If you work on the same codebase from different computers and update the same database you will experience Alembic migration conflicts. The error usually says
alembic.util.exc.CommandError: Target database is not up to date.
or
alembic.util.exc.CommandError: Can't locate revision identified by 'somenumber'
If you experience such errors:
- In the database remove the record from alembic_version table
- Remove any files from your computer under app/migrations.
Sometimes, if you use Mac OS you can experience some problems with installing the boilerplate.
- When you try to execute init.sh if you see the following error "init.sh: Command not found" go to the boilerplate's root folder and run
./init.sh
Then, if you see "./init.sh permission denied" run:
sudo chmod 755 'init.sh'
- When the script is running you may see the error during installation some Python packages like "Error: pg_config executable not found."
You need to fix this problem because script won't execute beyond. To fix this problem run
brew install postgresql
-
If you see any other problem with installation packages it can prevent from working script normally so you have to fix all this problems.
-
If you build and run the project but then you see the following exception: ImportError: No module named 'psycopg2._psycopg' uninstall and install the module back:
pip uninstall psycopg2
pip install psycopg2
- If you are trying to update database and see something like "dbupdate no such command", check your virtual environment. Check venv/Lib/site-packages folder to see if installation still exists (sometimes if you move the root folder the files may be presented on the disc but the current virtual environment just doesn't see them, so reinstall all packages from scratch.)
- Add or override necessary environment variables using
.env. - Run with
docker-compose:
docker-compose upThere are 2 places to set up your company name:
- Config.py - change COMPANY_NAME variable
- /src/shared/globalVars.js - change globalVars object
This free SaaS app boilerplate was create by SaaS Forge Inc. https://www.saasforge.dev
MIT License Copyright (c) 2019 SaaS Forge Inc. https://www.saasforge.dev.
If you experience any difficulties, or have any questions on using of this product, or find a bug please open an issue or drop us a line at info@saasforge.dev.
We provide this boilerplate as is, and we make no promises or guarantees about it.
There are many ways to do it:
- Star this repository
- Support us as sponsors, see details here: https://github.com/sponsors/saasforge
- Create your own SaaS based on this boilerplate and tell us and everyone about it. We will add it to our gallery of fame!
- Add any functionality or fix bugs and create a pull request
- Follow our Twitter and tweet about the boilerplate and your experience
- Follow our Facebook page and like it
Sergio Rovira @sgr0691
❤️ THANKS! ❤️
